How to Stream Custom Textures for RedM with CodeX
- Published on
- • 6 mins read•--- views

Introduction
Creating custom textures for RedM can be challenging since OpenIV doesn't support creating new YTD (texture dictionary) files for RedM yet. However, CodeX provides a better alternative that allows you to create and manage texture dictionaries easily.
This tutorial will guide you through the entire process of:
- Designing and exporting your texture
- Creating a YTD dictionary in CodeX
- Streaming the texture in your RedM resource
- Testing the result in-game
Step 1: Design and Export Your Texture
Before creating the texture dictionary, you need to design your icon or texture. You can use Photoshop or any image editor of your choice.
Export Requirements
When exporting your texture, make sure to:
- Export as .DDS format - This is the required format for RedM textures
- Enable minimaps - This ensures proper texture quality at different distances
- Set DXGI_FORMAT to SRGB - This is crucial for proper color rendering in RedM
These settings ensure your texture will display correctly when streamed in-game.
Step 2: Create YTD Dictionary in CodeX
Now let's create the texture dictionary using CodeX. Follow these steps:
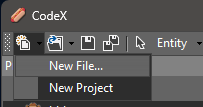
Step 2.1: Open File Menu
From the top menu bar in CodeX, click on File and then select New File....
Step 2.2: Create New File Dialog
A dialog box will appear. Configure the following:
- File type: Select Texture Dictionary (*.ytd) from the dropdown
- Folder: Choose your destination folder (e.g.,
C:\Users\Galaxy\Desktop\bln_ytds) - File name: Enter your dictionary name (e.g.,
bln_tutorial_dict.ytd)
Click Ok to create the dictionary.

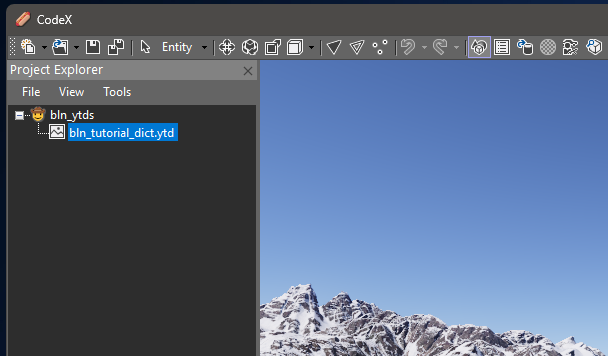
Step 2.3: Open the Dictionary
From the side panel (Project Explorer), locate your newly created dictionary file and double-click it to open it in the editor.
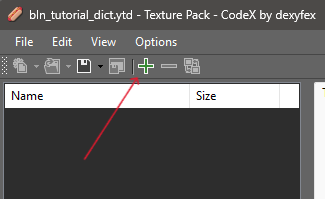
Step 2.4: Add Your Texture
A new window will open showing the texture dictionary. To add your texture:
- Click the green plus button (+) in the toolbar
- Browse and select your
.ddsimage file that you exported earlier
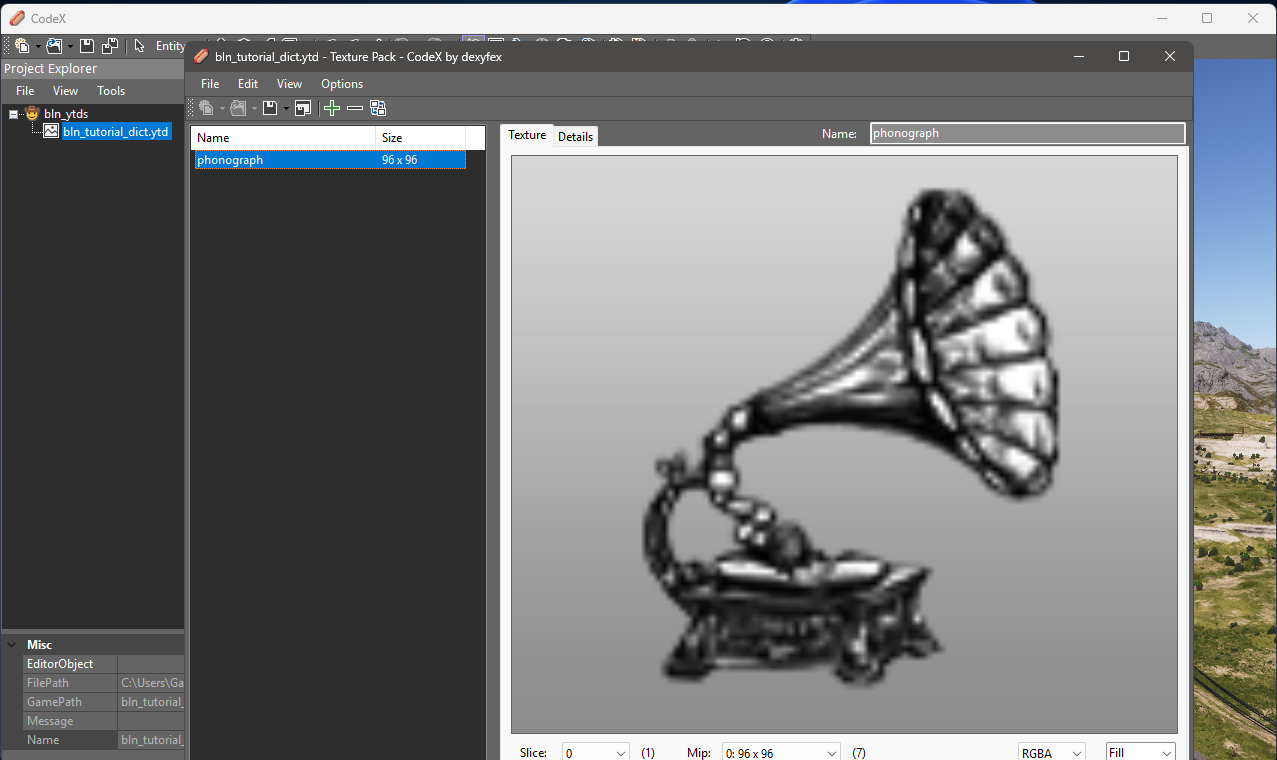
Step 2.5: Save the Dictionary
After selecting your texture, it will be added to the dictionary as shown in the list. You can see:
- Name: The texture name (e.g.,
phonograph) - Size: The texture dimensions (e.g.,
96 x 96)
Now save the dictionary file and you're done with CodeX!
Step 3: Stream the Texture in Code
Now that you have your YTD dictionary, let's implement it in your RedM resource.
Project Structure
Your resource should have the following structure:
your-resource/
├── fxmanifest.lua
├── client.lua
└── stream/
    └── bln_tutorial_dict.ytd
fxmanifest.lua
Add your texture dictionary to the files section:
fx_version "cerulean"
rdr3_warning 'I acknowledge that this is a prerelease build of RedM, and I am aware my resources *will* become incompatible once RedM ships.'
game "rdr3"

author 'BLN Studio <bln-studio.com>'
description 'RedM Tutorial.'
version '1.0.0'

lua54 'yes'

files {
    'stream/bln_tutorial_dict.ytd'
}

client_scripts {
    'client.lua'
}
client.lua
Here's the client-side code to load and display your texture:
local dict = "bln_tutorial_dict" -- dictionary name
local textureName = "phonograph" -- texture name

-- Request the texture dictionary
CreateThread(function()
    RequestStreamedTextureDict(dict, false)
    while not HasStreamedTextureDictLoaded(dict) do
        Wait(100)
    end
end)

-- Draw sprite in the middle of the screen
CreateThread(function()
    while true do
        Wait(0)

        if HasStreamedTextureDictLoaded(dict) then
            local centerX = 0.5
            local centerY = 0.5

            -- Draw sprite (adjust size as needed)
            local spriteWidth = 0.1   -- 10% of screen width
            local spriteHeight = 0.17 -- 10% of screen height

            DrawSprite(
                dict,
                textureName,
                centerX,      -- X position (normalized 0.0-1.0)
                centerY,      -- Y position (normalized 0.0-1.0)
                spriteWidth,  -- Width (normalized)
                spriteHeight, -- Height (normalized)
                0.0,          -- Rotation
                255,          -- Red
                255,          -- Green
                255,          -- Blue
                255           -- Alpha
            )
        end
    end
end)
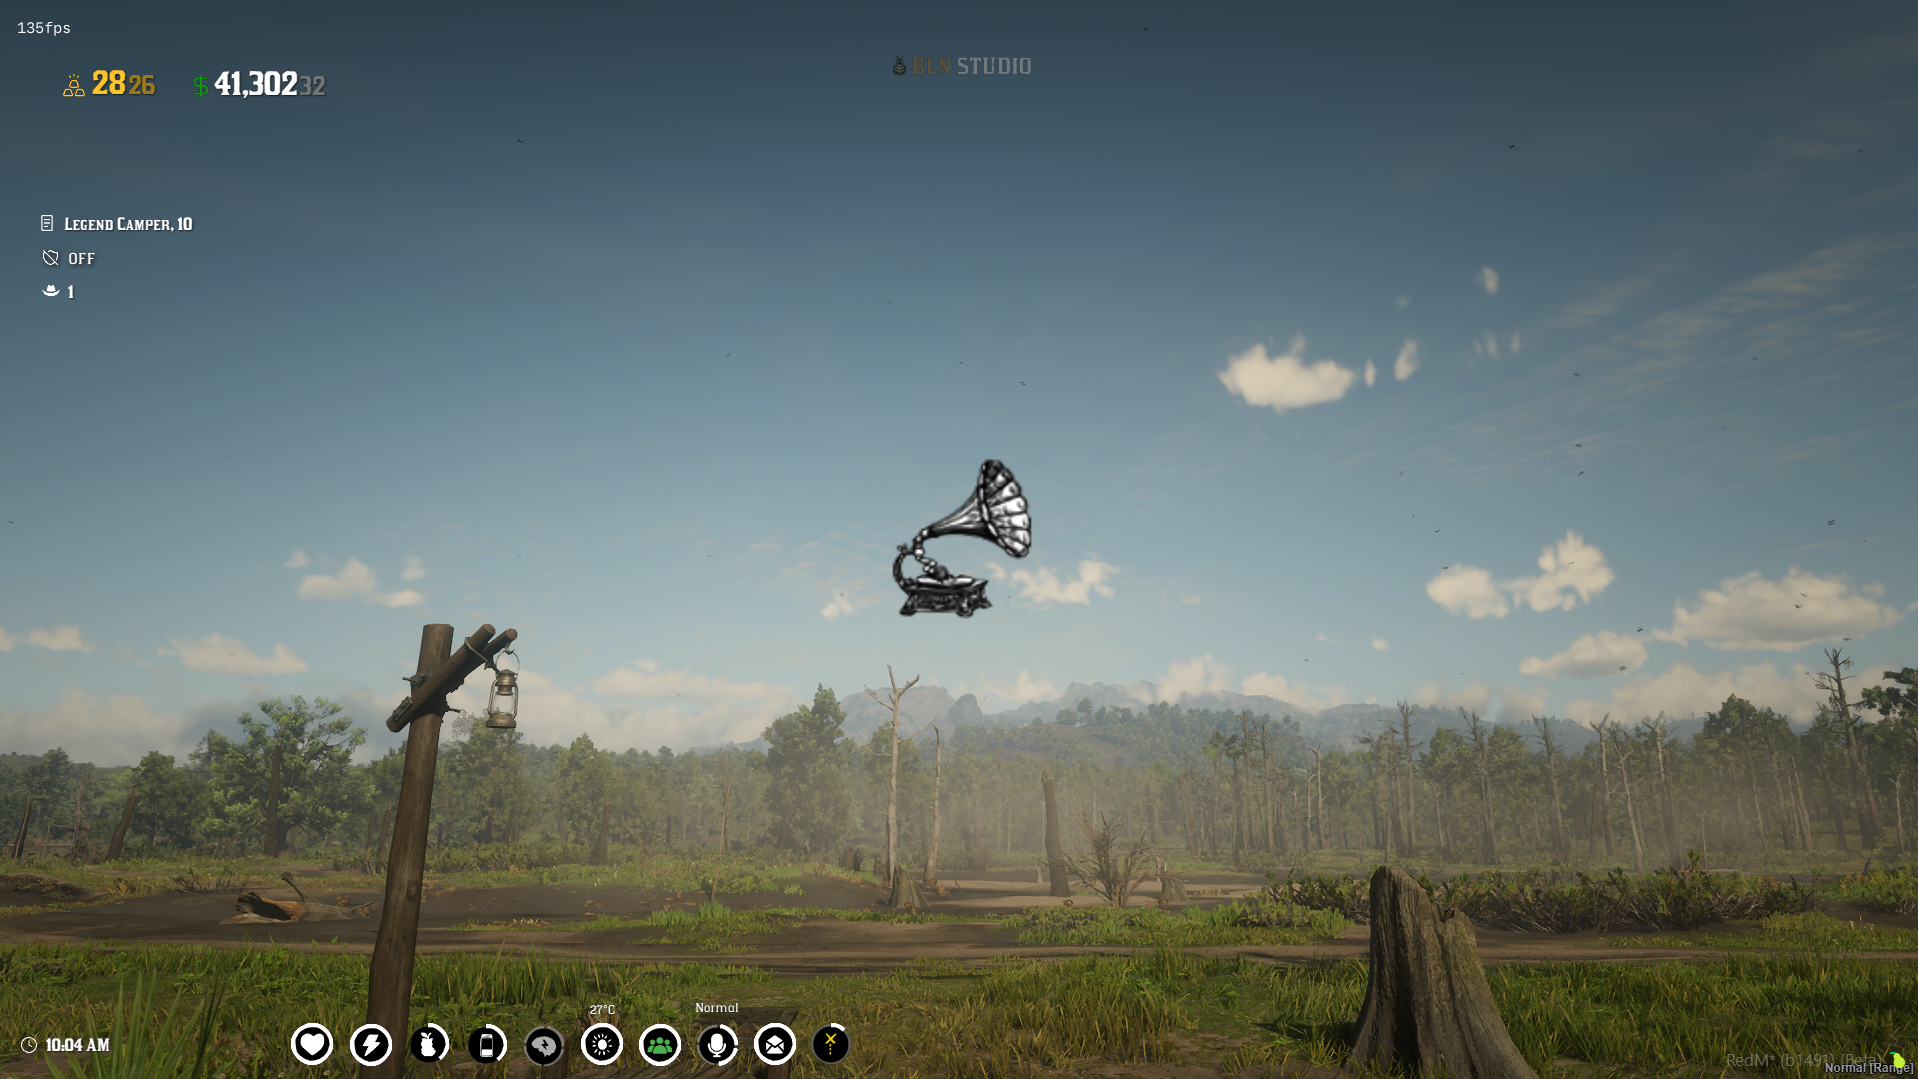
Step 4: Test and Results
Now you can ensure your resource and test it in-game. The texture should appear in the middle of your screen as shown below:
Customization Tips
- Adjust
spriteWidthandspriteHeightto change the size - Modify
centerXandcenterYto change the position - Change the RGB values (0-255) to tint the texture
- Adjust the
Alphavalue (0-255) for transparency
Note: There are many different ways to stream and use your custom textures in RedM. The important part covered in this tutorial is creating the YTD dictionary using CodeX. Once you have your YTD file, you can use it in various ways:
- The example above using
DrawSpriteto display on screen- Streaming textures on objects using natives.
- Any resource that requires texture dictionaries and texture names (like BLN Wheel, UI systems, etc.)
The key is having a properly created YTD file with your textures inside it, which you can then reference using the dictionary name and texture name throughout your RedM resources.
Example Project
You can find a complete example project with the exact code and structure explained in this tutorial on GitHub:
View the Example Project on GitHub
Using The Custom Textures with BLN Wheel
If you're using BLN Wheel (a premium radial menu system for RedM), you can easily integrate your custom textures as menu item icons.
Step 1: Add YTD to Stream Folder
Place your custom YTD dictionary file in the bln_wheel/stream/ folder:
bln_wheel/
└── stream/
    ├── bln_wheel_textures.ytd  (existing)
    └── bln_tutorial_dict.ytd    (your custom texture)
Step 2: Update fxmanifest.lua
Add your custom YTD to the files section in bln_wheel/fxmanifest.lua:
files {
    'stream/bln_wheel_textures.ytd',
    'stream/bln_tutorial_dict.ytd'  -- Add your custom texture dictionary
}
Step 3: Use in Menu Items
Now you can use your custom texture in the menu items defined in shared/menu.lua. Simply reference your texture dictionary and texture name in the icon property:
{
    name = "custom_item",
    label = "My Custom Item",
    icon = {
        texture_dict = "bln_tutorial_dict",  -- Your YTD name (without .ytd extension)
        texture_name = "phonograph"           -- The texture name inside the YTD
    },
    color = { r = 255, g = 255, b = 255, a = 255 },
    action = function()
        -- Your action code here
        print("Custom item clicked!")
    end
}
Now your custom textures will appear as beautiful icons in your BLN Wheel menu!
Conclusion
Congratulations! You've successfully created and streamed a custom texture for RedM using CodeX. This method allows you to add custom icons, UI elements, and textures to your RedM server without relying on OpenIV.
Happy coding! 🚀
Join Our Community!
Get help, share ideas, get free scripts, and connect with other RedM enthusiasts in our Discord server.
Join Discord